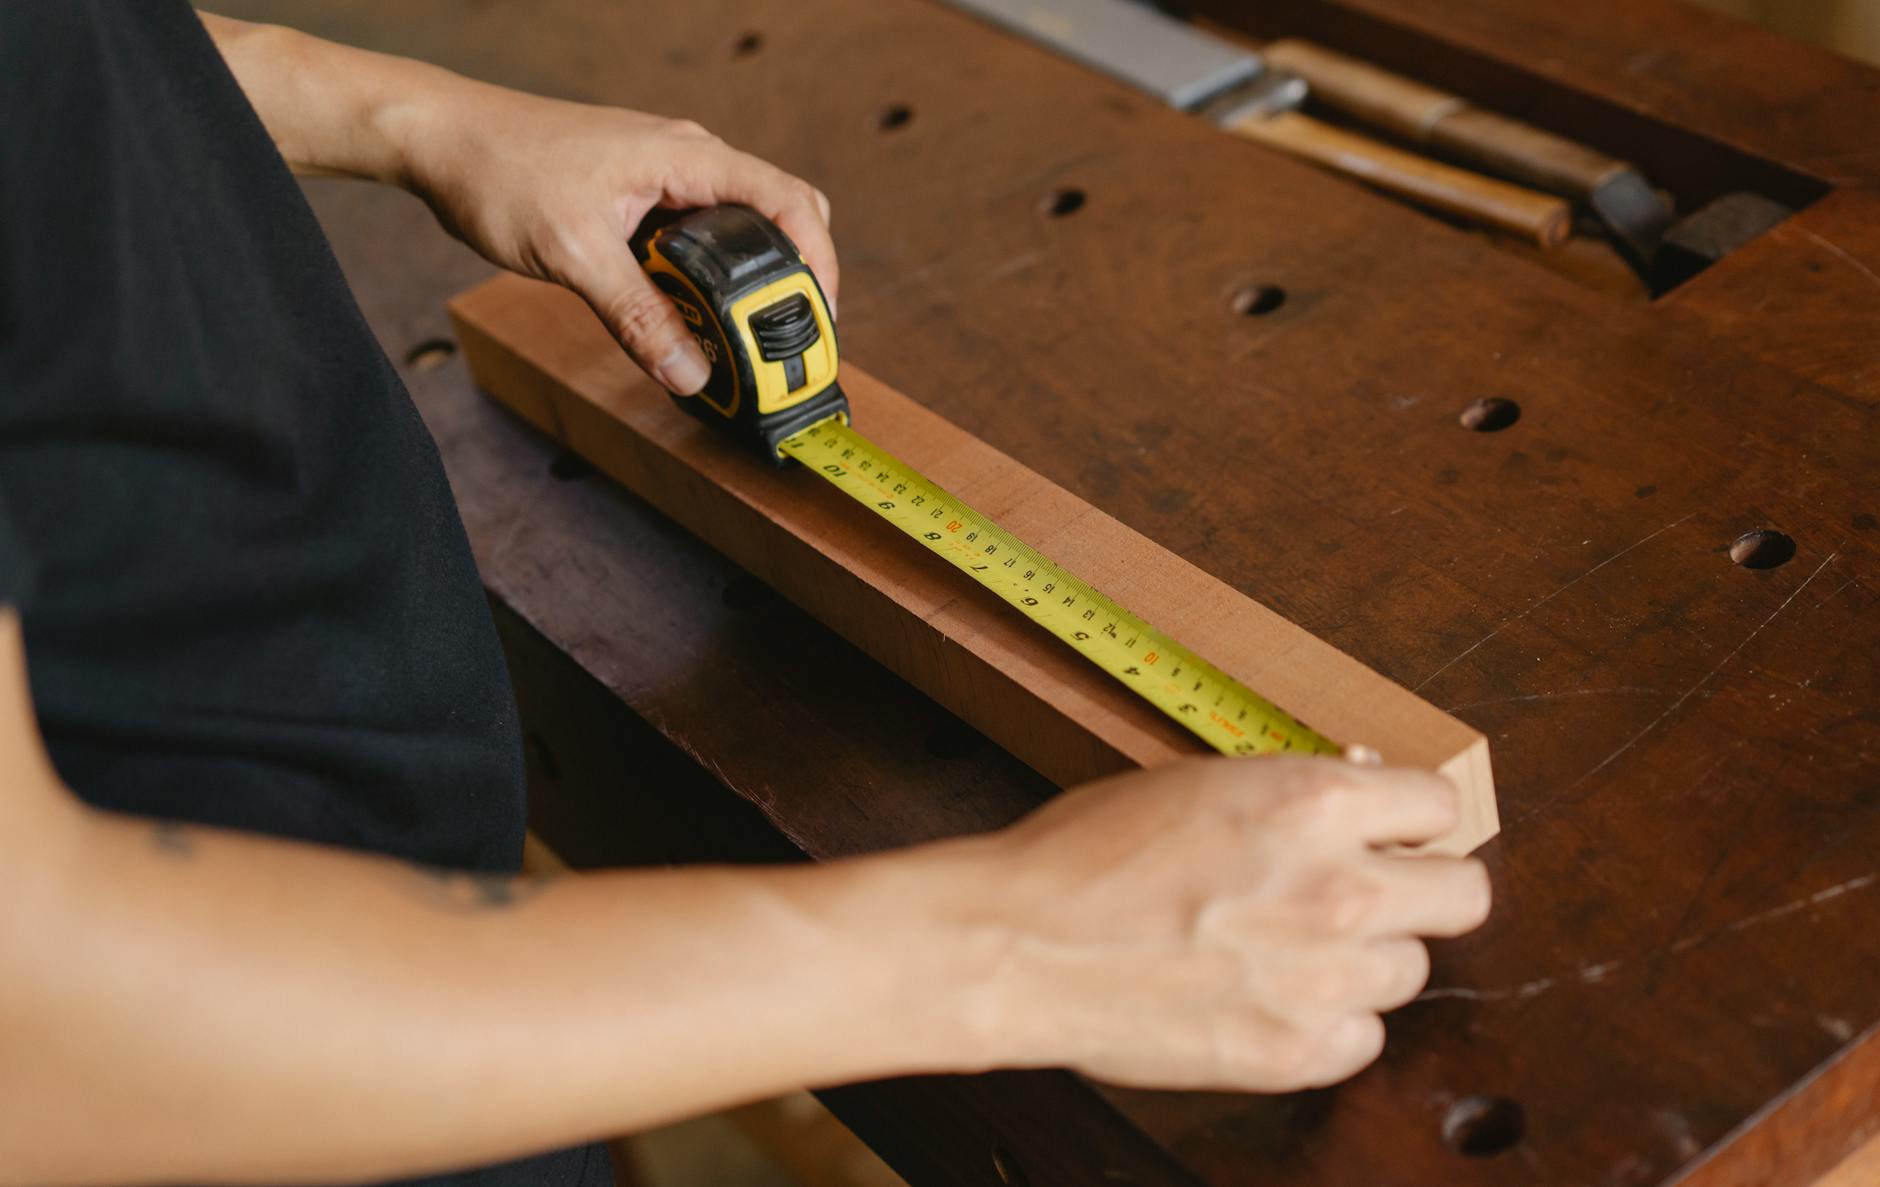
Most cutting mistakes in home projects don't come from a dull blade or a shaky hand — they come from misreading the tape before the cut is ever made. Once you understand what those tiny marks between the inch lines actually mean, measuring stops being a guessing game and becomes second nature.
The Basic Layout
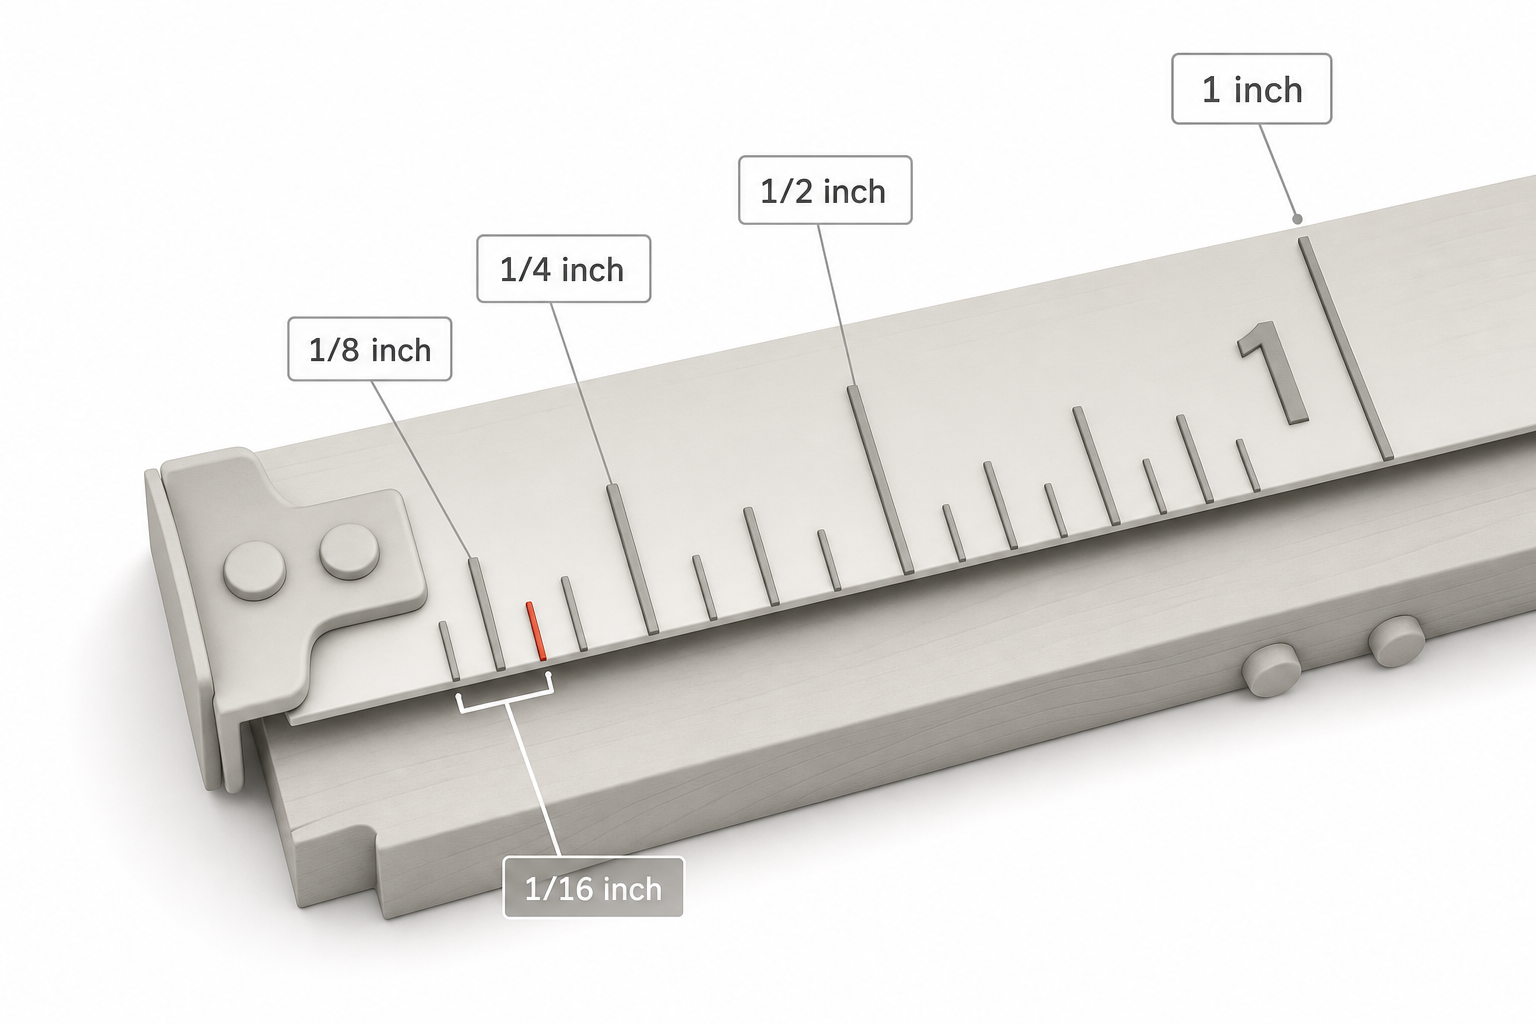
A standard tape measure shows whole inches as the longest, boldest lines, usually numbered. Between each inch, the blade is divided into smaller increments — typically halves, quarters, eighths, and sixteenths of an inch, marked by lines of decreasing length. The longer the line, the "rounder" the fraction:
- The longest mark between numbers is the half-inch (0.5in).
- The next-longest marks are the quarter-inch points (0.25in and 0.75in).
- Shorter still are the eighth-inch marks.
- The shortest lines are sixteenths of an inch — the finest gradation on most household tapes.
Some tapes also print a small diamond or a bolded number every 19.2in, a spacing carpenters use for spacing floor and roof trusses on certain framing layouts; you can ignore it unless you're doing structural framing work.
Step 1: Find Your Whole Number First
Before worrying about fractions, identify the last whole inch mark before your measurement point. If your mark falls between the "14" and "15" lines, you already know your answer will be "14 and something."
Step 2: Count Marks From the Nearest Half-Inch
Rather than counting sixteen tiny lines one by one (easy to lose track of), train your eye to jump in stages:
- Find the nearest half-inch line — is your mark before or after it?
- Narrow to the nearest quarter-inch.
- Narrow to the nearest eighth-inch.
- Only drop to sixteenths if the mark clearly sits between eighth-inch lines.
This hierarchy is exactly why the lines are printed at different lengths — the tape is designed to be read in stages, not counted tick by tick.
Step 3: Reduce the Fraction
Beginners often write down a reading like "14 and 8/16 inches" when it should simply be "14 and 1/2 inches." On a cut list, always reduce to the simplest fraction:
- 2/16 = 1/8
- 4/16 = 1/4
- 8/16 = 1/2
- 6/16 = 3/8
- 12/16 = 3/4
Most combination squares, speed squares, and pencil marks are made at eighth- or sixteenth-inch precision, so there's rarely a reason to go finer than that for typical carpentry, trim, or shelving work.
Step 4: Account for the Hook Play
The metal hook at the end of a tape is intentionally loose — it moves in and out by about the thickness of the hook itself (0.06in or so). This isn't a defect; it's a built-in calibration so the tape reads accurately whether you're hooking the end of a board (pulling the hook taut) or butting it against a surface (pushing the hook in). Don't try to hold the hook rigid — let it float as designed.
Step 5: Mark With a V, Not a Dash
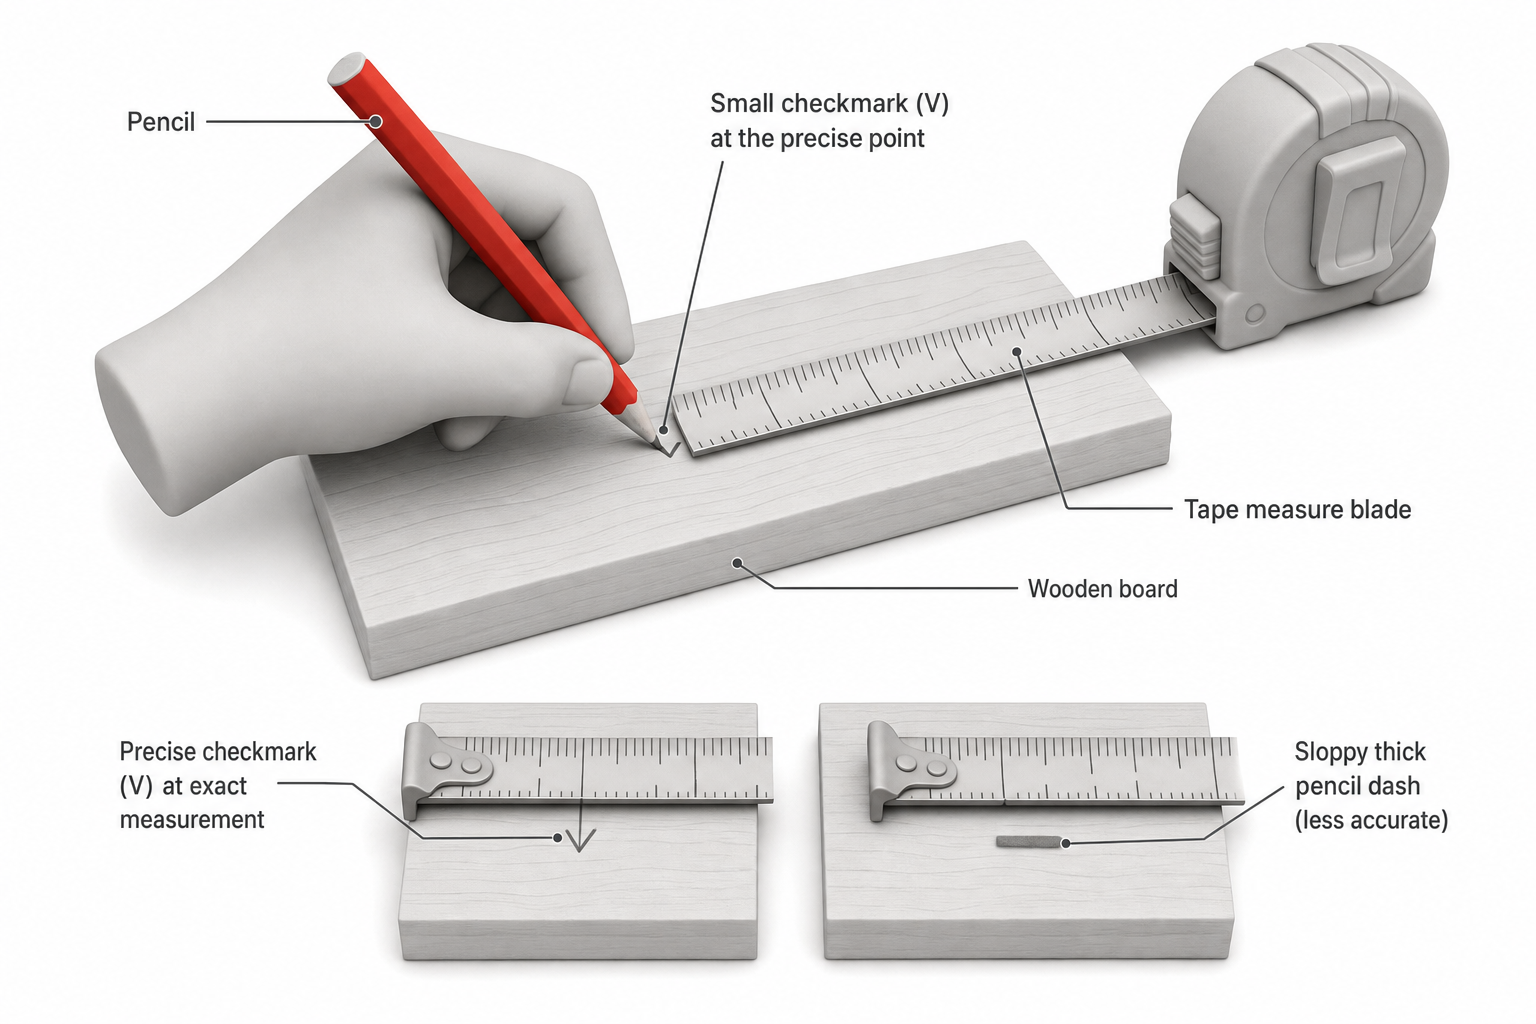
Instead of a straight pencil line (which has width and invites error), make a small "V" or checkmark with the point precisely at your measurement, then draw your cut line from that point. This is a habit most experienced carpenters rely on because a thick pencil dash can shift your actual cut by a sixteenth of an inch or more — enough to matter on tight trim joints.
Step 6: Double-Check With the "Measure Twice" Rule
Read the measurement once, look away, then measure again independently rather than just glancing back at the same spot. This catches the common error of misreading which whole-inch line you started from — a mistake that's easy to make when a board's edge isn't perfectly flush with the tape's zero point.
Common Reading Mistakes to Watch For
- Off-by-one-inch errors: Losing count of which numbered inch you're near, especially on long spans where you have to slide your hand along the blade.
- Confusing eighths and sixteenths: If you're not sure which mark is longer, look at two or three marks in a row — the pattern of long/short/medium becomes obvious once compared side by side.
- Not accounting for blade curl: Metal tape blades have a slight curve (camber) that lets them extend a few feet unsupported. Measuring around a curved surface or letting the blade twist can introduce small errors on long pulls.
- Reading at an angle: Always look straight down at the mark (perpendicular to the blade), not from an angle, which can shift your apparent reading by a sixteenth of an inch or more — a visual effect similar to parallax error on a car speedometer.
Reading Longer Measurements on a Cut List
For longer boards, write measurements consistently as feet-inches-fraction, such as "6 ft 3-1/4 in," rather than mixing decimal and fractional notation on the same list. If a plan gives you a decimal measurement (like 6.25 feet), convert it before cutting: 0.25 feet is 3in, so 6.25 feet becomes 6ft 3in. Mixing systems mid-project is one of the most common causes of a short or long cut.
FAQ
How do I read a tape measure between the numbers? Look at the length of the tick mark: the longest unmarked line between two inch numbers is the half-inch, the next-longest are quarters, then eighths, then sixteenths. Work from largest to smallest fraction rather than counting every tiny line individually.
Why does the hook on my tape measure wiggle? That play is intentional — it shifts by the thickness of the hook itself so the tape reads accurately whether you're hooking an outside edge or butting the tape against an inside corner. It's a calibration feature, not damage, unless it's bent or the rivets are loose.
What's the smallest fraction I need to worry about for home projects? For most household carpentry, trim, and shelving, eighth-inch or sixteenth-inch precision is plenty. Finish carpentry and cabinetry sometimes call for tighter tolerances, but general framing and DIY work rarely requires anything finer than a sixteenth.
Why do my measurements come out different each time I check them? This is usually caused by reading the blade at an angle instead of straight down, letting the hook shift unevenly, or losing track of the nearest whole inch on a long pull. Slow down, confirm your starting whole number, and read perpendicular to the blade.
What does the diamond mark every 19.2 inches mean? It's a layout reference some tapes include for spacing structural framing members on certain joist or truss layouts. If you're not doing structural framing, you can safely ignore it.