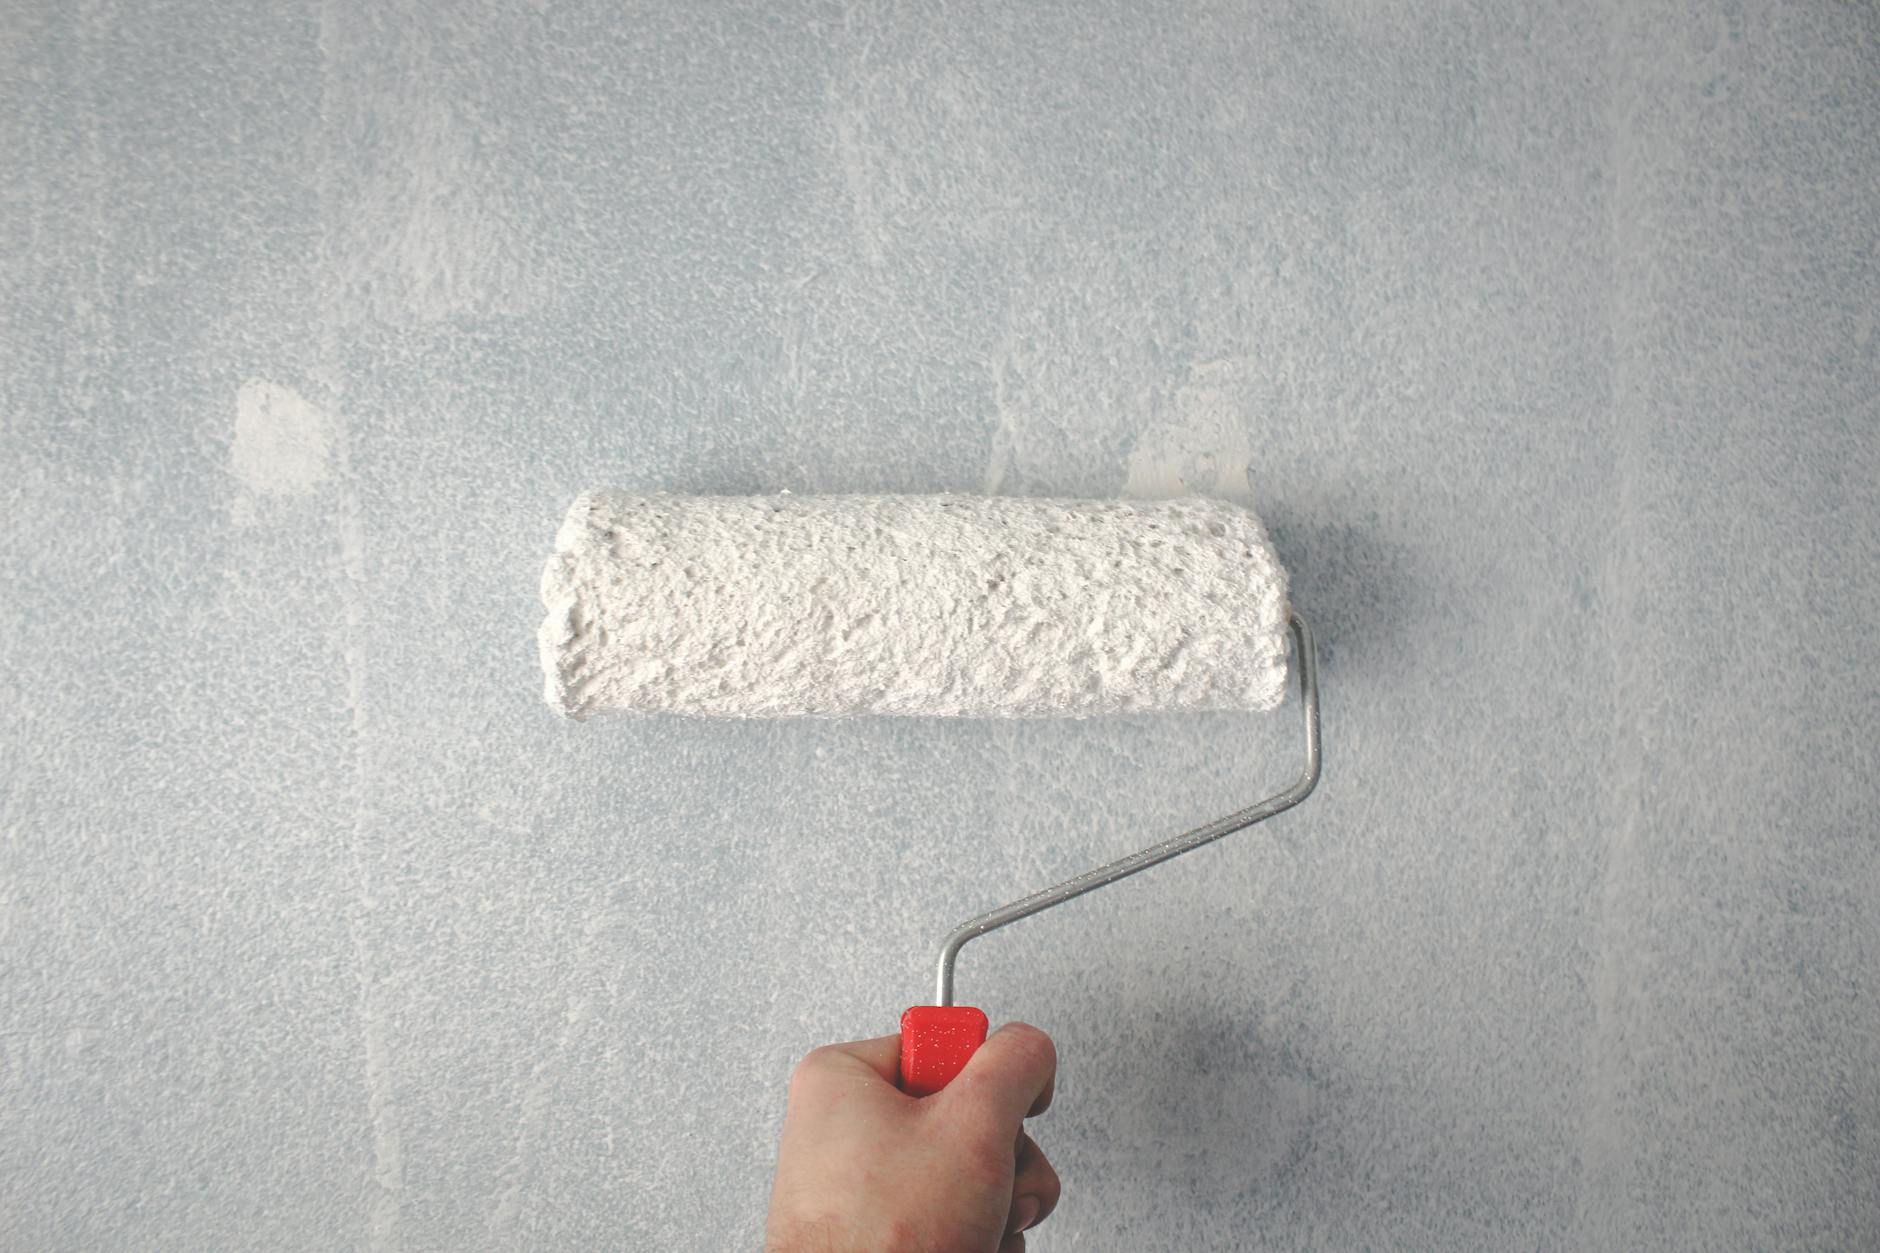
Roller marks — those faint stripes, lap lines, or textured ridges that show up once paint dries — almost always come down to three things: how much paint is on the roller, the pattern used to spread it, and how long you wait between coats. Fix those three variables and nearly any wall will dry smooth, even under raking light from a window or lamp.
Why Roller Marks Happen in the First Place
Most lap marks are caused by painting over an edge that has already started to dry (called "working the edge" too late). The fresh paint doesn't blend into the tacky paint, so you get a visible line. Texture and stipple marks, on the other hand, usually come from the wrong nap length, too little paint on the roller, or pressing too hard and rolling too fast.
What You'll Need
- A quality roller frame and cage (a cheap, wobbly frame is a common hidden cause of uneven pressure)
- Roller covers with a nap suited to your wall texture — a shorter nap (about 0.25in to 0.38in) for smooth drywall, longer nap for textured or knockdown walls
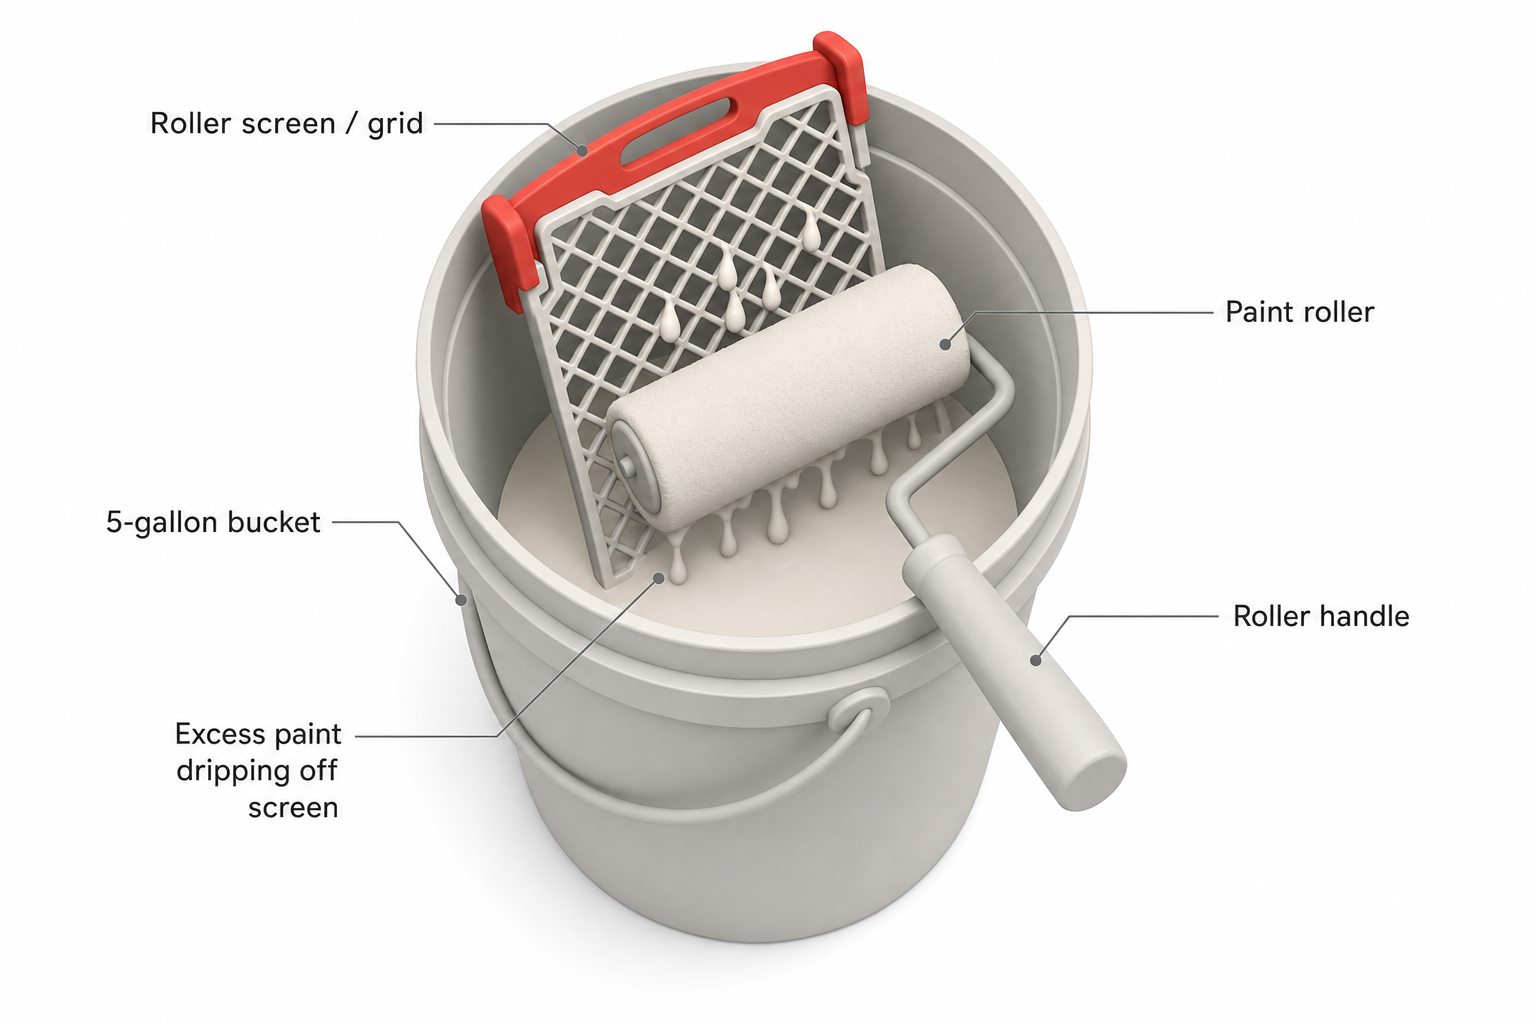
- A 5-gallon bucket with a roller screen/grid, rather than a paint tray, for more even loading on larger jobs
- An angled sash brush for cutting in corners and edges
- Painter's tape and a drop cloth
- A paint with a sheen and formulation suited to the room (flatter sheens forgive minor texture; satin and semi-gloss show roller marks more readily)
Step 1: Cut In First, But Don't Let It Dry Alone
Use the sash brush to cut in around trim, ceiling lines, and corners for one wall at a time — not the whole room. If cut-in edges sit and dry before you roll the field of the wall, you'll see a slightly different texture or sheen line where brush meets roller. Work one wall (or one manageable section) from cutting-in to rolling before moving to the next.
Step 2: Load the Roller Correctly
This is where most roller marks start.
- Dip the roller about a third of the way into the paint.
- Roll it back and forth on the screen or the tray's ramp several times until the nap is evenly coated and no longer dripping. It should look uniformly saturated, not shiny-wet or patchy.
- Never slap a heavily loaded roller straight onto the wall — that's what causes fat, uneven ridges and drips that read as marks once dry.
Step 3: Use a Consistent Rolling Pattern
- Start about 2in away from the corner or cut-in edge so you don't build up a ridge of paint right at the line.
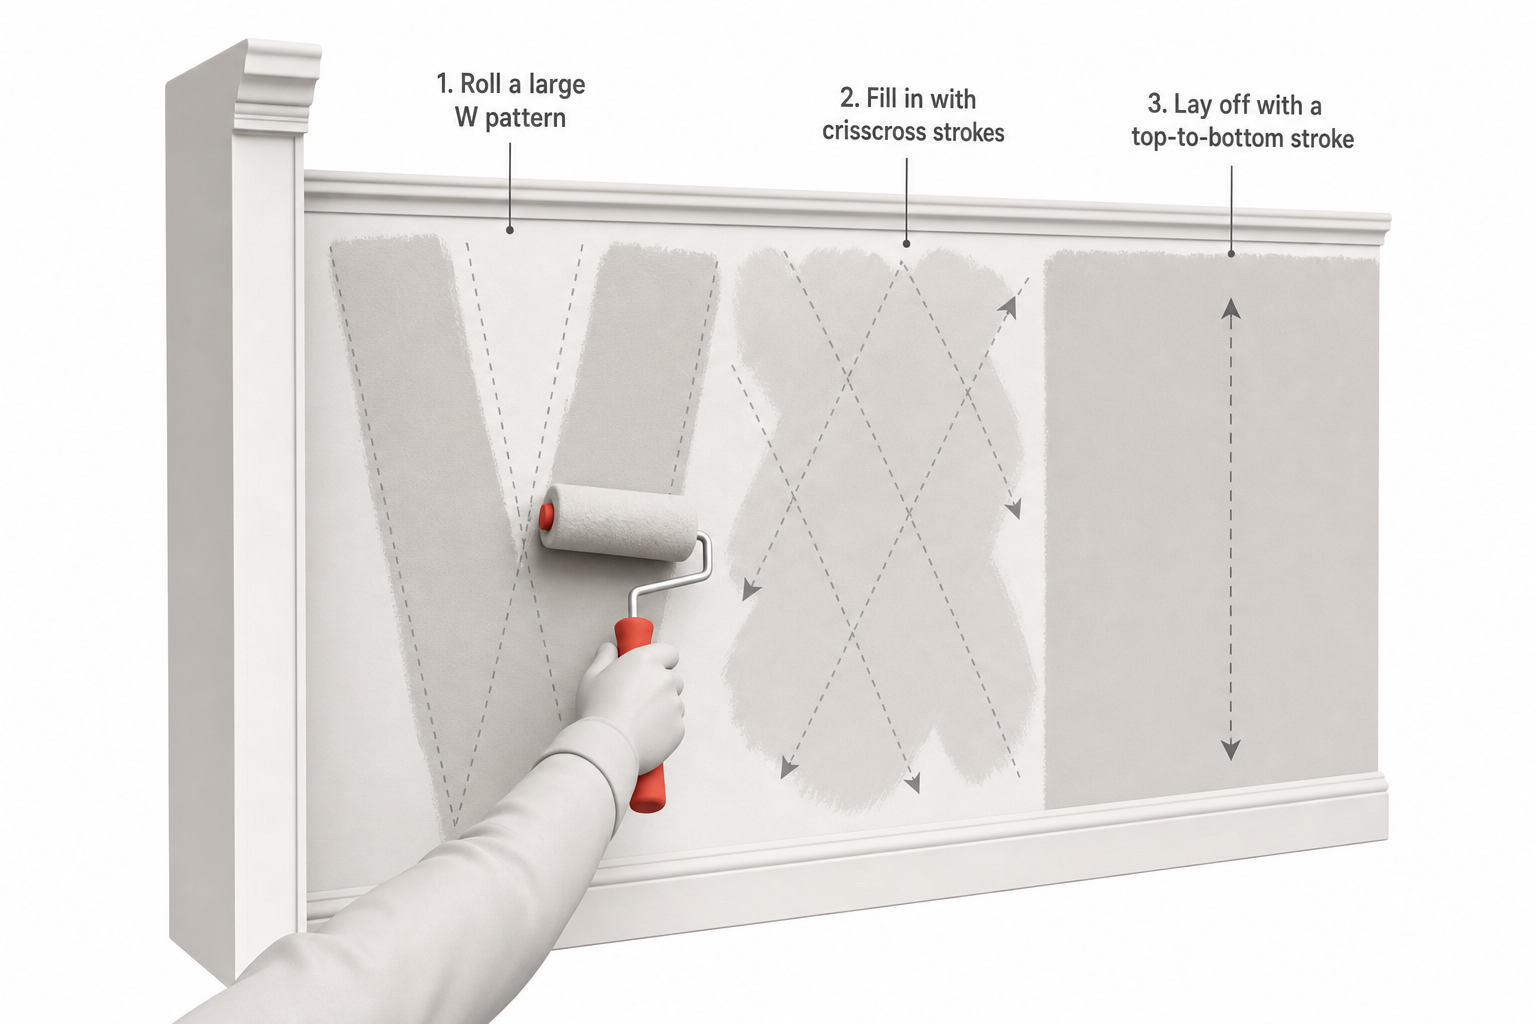
- Roll a large "W" or "N" shape roughly 3ft wide on the wall, without lifting the roller.
- Without adding more paint, go back and fill in the W with horizontal and vertical strokes, crisscrossing to spread the paint evenly across the whole section.
- Finish the section with light, unloaded vertical strokes from top to bottom of that panel — this is often called "laying off." Use only the weight of the roller, not downward pressure, and lift the roller gently at the end of each stroke so it doesn't dig in and leave a stop-mark.
- Move to the next section and slightly overlap into the wet edge of the previous one before it starts to flash (dull down as it dries) — usually within a few minutes in normal room conditions.
Step 4: Maintain a Wet Edge
Keeping a "wet edge" — always overlapping into paint that's still workable — is the single biggest technique for avoiding lap marks. Practical tips:
- Work top to bottom in vertical strips about 2ft to 3ft wide, moving steadily across the wall rather than jumping around.
- On hot, dry, or breezy days, paint dries faster, so work in narrower strips and move a bit quicker.
- Avoid stopping mid-wall for a break; finish a full wall (corner to corner) before setting the roller down.
- Reload the roller before it starts to feel dry or starved — a roller running low on paint will drag and stipple instead of gliding.
Step 5: Watch Your Roller Speed and Pressure
Rolling too fast can fling paint (spatter) and cause uneven coverage; rolling too slowly with too much pressure can push paint out unevenly and create ridges at the edges of each stroke. Aim for a moderate, even pace and let the roller's own weight do most of the work rather than pressing down.
Step 6: Respect Drying and Recoat Times
Even a technically perfect first coat can show marks if the second coat goes on too soon or too late.
- Check the paint can's label for the manufacturer's recommended recoat time — this varies by product, but many latex/acrylic wall paints suggest waiting at least a few hours, with full cure taking considerably longer.
- Recoating before the first coat has properly dried can pull up the underlying paint or trap solvent, leading to soft spots, texture, or visible roller drag.
- Waiting too long between coats generally isn't a marking issue but can make the wall harder to touch up seamlessly if something goes wrong.
- Keep the room at a moderate, steady temperature and avoid strong direct airflow (fans blowing directly on wet paint) while it dries, since uneven drying speed across a wall can create subtle sheen differences.
Step 7: Inspect With Raking Light Before You Call It Done
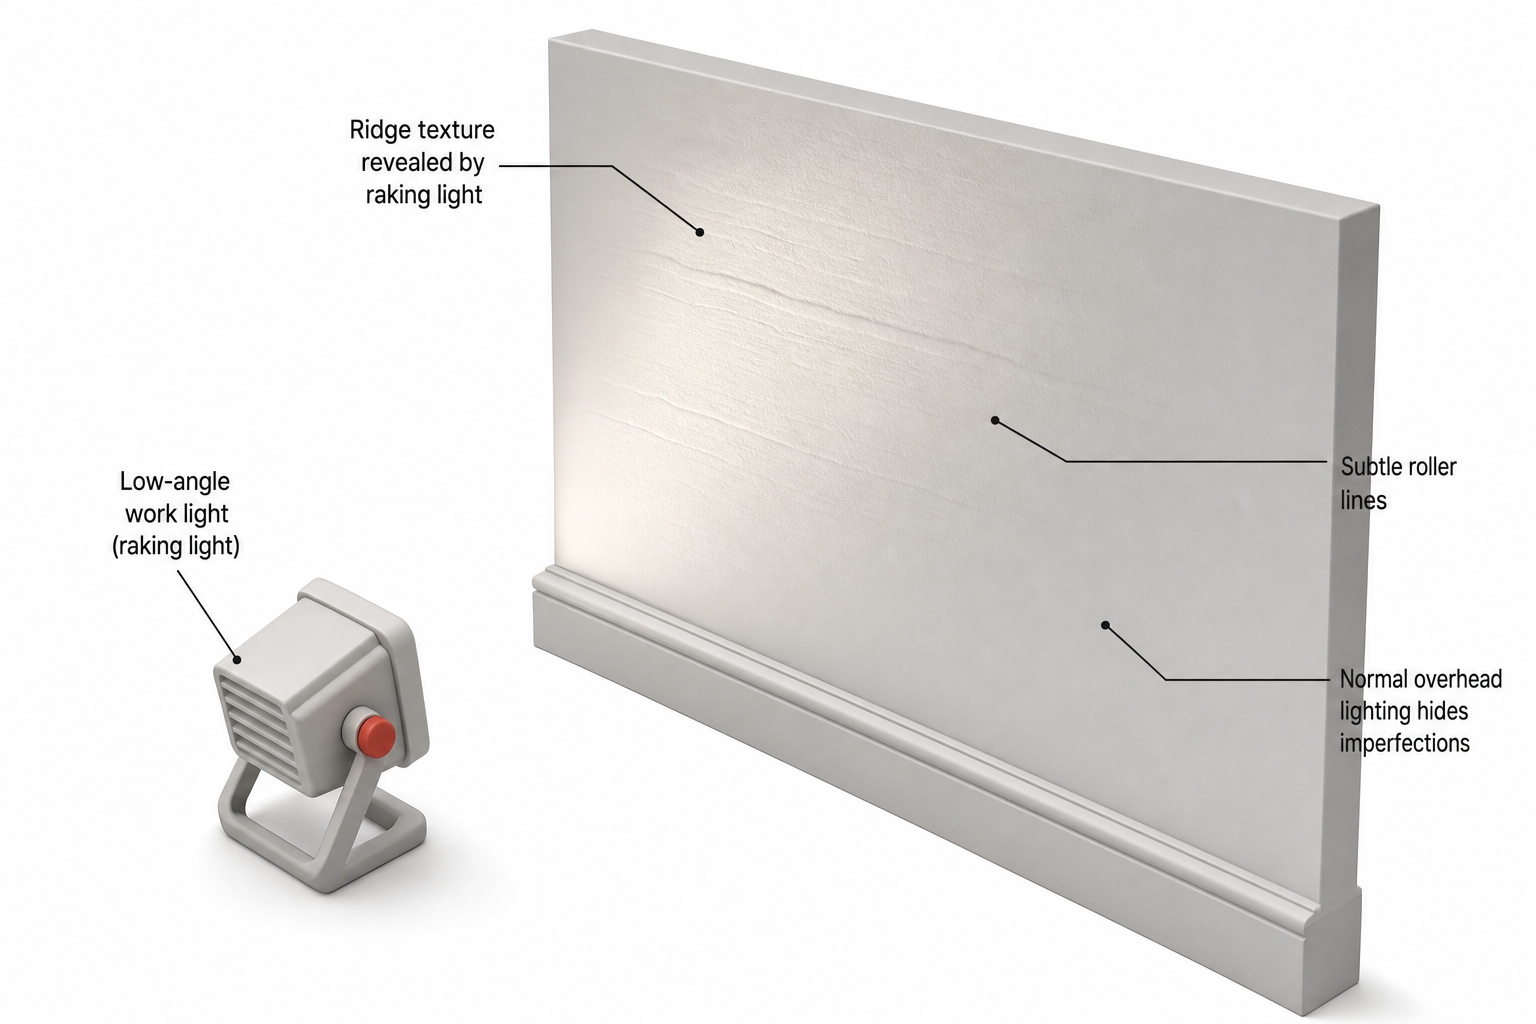
Once the first coat is dry, shine a work light or flashlight at a low angle across the wall (raking light). This reveals texture, ridges, or missed spots that are invisible under normal room lighting. Lightly sand any raised ridges with fine-grit sandpaper (around 220-grit) and wipe away dust before applying the next coat.
Common Mistakes That Cause Roller Marks
- Using a paint tray instead of a bucket and screen for a large room — trays make it harder to load the roller evenly and encourage overloading.
- Switching roller nap sizes mid-job — this changes the texture pattern and can create a visible seam between sections painted with different covers.
- Painting directly under a ceiling light or lamp while it's on — the harsh, close light exaggerates every imperfection while wet, leading you to