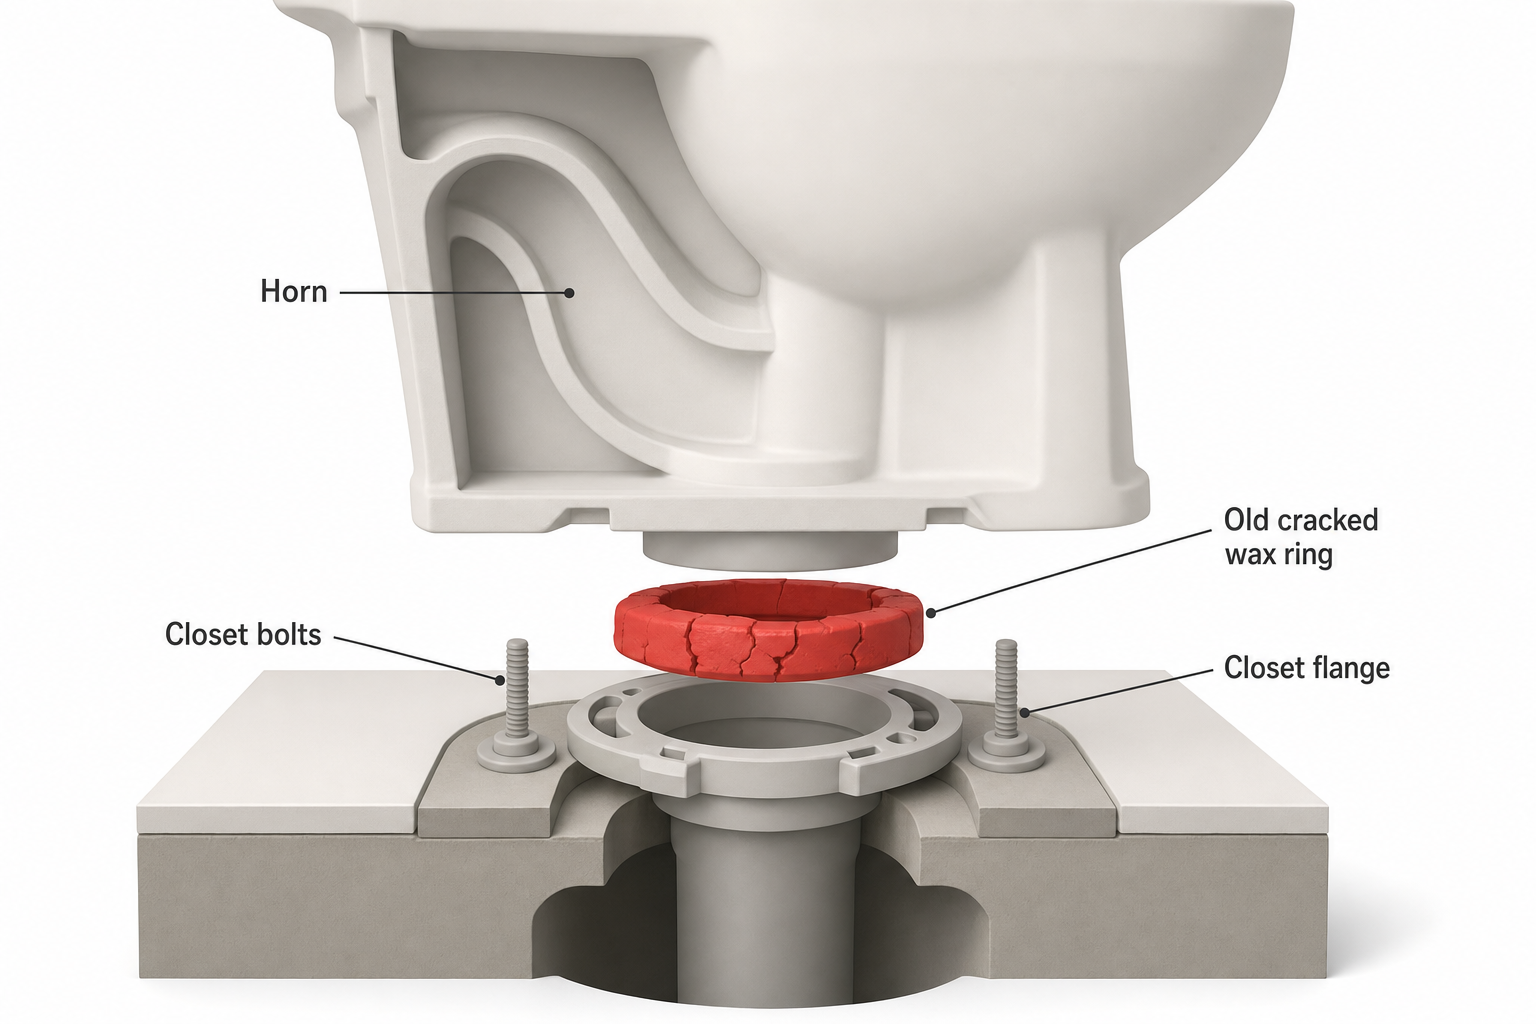
A wobbly toilet, a musty smell near the base, or water seeping out onto the floor after each flush almost always points to one thing: a failed wax ring. This ring of wax sits between the toilet's horn (the outlet at the bottom of the bowl) and the closet flange in the floor, sealing the connection to the drain pipe. Over years of use, minor rocking, or a botched original installation, that seal can compress unevenly or crack, letting waste water and sewer gas escape at the base.
The good news is that this is one of the more approachable plumbing repairs a homeowner can tackle. You don't need to cut pipe or solder anything — just patience, a few basic tools, and a willingness to get a little messy. Here's how to replace a toilet wax ring the right way, so the fix actually lasts.
Signs You Need a New Wax Ring
- Water pooling around the base of the toilet after flushing, especially if it's not condensation
- The toilet rocks or rests unevenly on the floor
- A persistent sewer-gas odor in the bathroom that isn't explained by a dry P-trap elsewhere
- Discoloration, soft spots, or staining on the floor or ceiling below (if the bathroom is upstairs)
- The toilet was recently removed for flooring work or snaking and needs to go back down
Tools and Materials You'll Need
- New wax ring (standard or the extra-thick/flanged type if your flange sits low relative to the floor)
- Adjustable wrench or a socket set
- Putty knife or plastic scraper
- Rags, old towels, and a bucket or wet/dry shop vacuum
- Sponge for removing residual tank and bowl water
- New closet bolts (recommended any time you reset a toilet)
- Level
- Utility knife
- Caulk (optional, for sealing the base afterward)
Refer to the recommendations below for wax ring types and closet bolt kits that suit standard flange heights.
Step 1: Shut Off Water and Drain the Tank and Bowl
Turn the shutoff valve behind the toilet clockwise until it stops. Flush the toilet to empty the tank, then hold the flush lever down briefly to drain as much water as possible. Use a sponge to soak up what remains in the tank and bowl — you want both as dry as you reasonably can before disconnecting anything.
Disconnect the supply line from the shutoff valve or the fill valve tailpiece using an adjustable wrench, and have a small towel ready to catch drips.
Step 2: Remove the Toilet
Pry off the plastic caps covering the closet bolts at the base of the toilet. Use a wrench to hold the bolt steady while you loosen the nut with pliers or another wrench — these often corrode, so if a nut won't budge, cutting it off with a hacksaw blade is usually easier than fighting it.
Once both nuts are off, rock the toilet gently side to side to break the old wax seal, then lift it straight up and off the bolts. Set it on towels, away from foot traffic.
Step 3: Remove the Old Wax Ring and Inspect the Flange
Using a putty knife, scrape the old wax off both the horn of the toilet and the closet flange. Wax comes off in sticky sheets — work it off in sections rather than trying to wipe it away, and stuff a rag loosely into the drain opening to block sewer gas and to prevent small tools or debris from falling in.
While you're in there, check the flange itself:
- Cracks or breaks in the plastic or metal flange — a compromised flange won't hold the closet bolts securely and should be repaired or replaced before you reinstall.
- Flange height relative to the finished floor — the top of the flange should sit at or slightly above the floor. If new flooring or an old repair has left the flange sitting 1in or more below the floor surface, a standard wax ring may not make a reliable seal, and you'll likely need an extra-thick wax ring or a flange extender kit instead.
- Rust or corrosion on a metal flange, which weakens the bolt slots over time.
Step 4: Install New Closet Bolts
Slide the old closet bolts out of the flange slots and replace them with new ones — they're inexpensive and it's much easier to do this now than after the wax ring is in place. Seat the bolt heads in the flange slots and position them so they're evenly spaced and roughly parallel, angled slightly outward to match where the toilet's bolt holes will land.
Step 5: Set the New Wax Ring
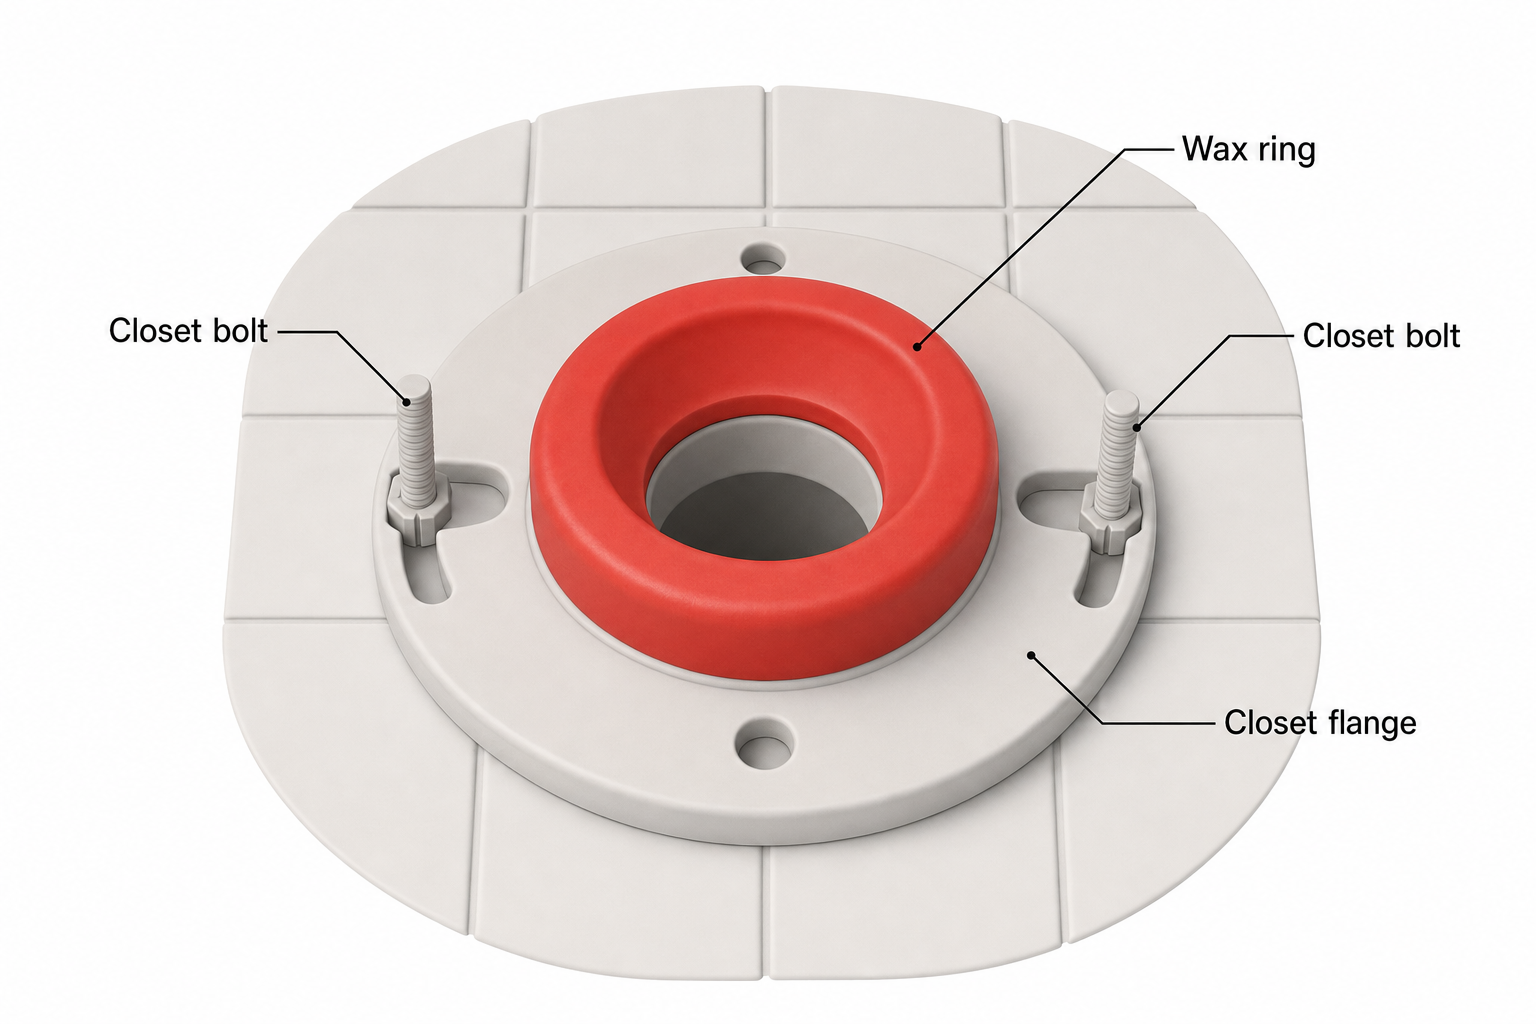
Remove the rag from the drain opening. Place the new wax ring flat side down onto the flange, centered over the opening, with the tapered wax side facing up toward where the toilet horn will seat. Some rings include a plastic funnel or sleeve — if yours does, make sure it's oriented to point down into the drain, not up.
Alternatively, some installers prefer pressing the ring onto the toilet's horn instead of the flange; either method works as long as the ring stays centered and undisturbed until the toilet is set.
Step 6: Lower the Toilet Into Place
With a helper if possible, lift the toilet by the bowl (not the tank) and lower it straight down over the bolts, aligning the horn with the wax ring and the bolt holes with the protruding bolts. Lower it slowly and evenly — avoid sliding or twisting the bowl once it touches the wax, since that can shift or tear the seal.
Once it's down, press firmly on the bowl rim with your body weight, rocking gently, to compress the wax ring evenly on all sides. You should feel the toilet settle down against the floor.
Step 7: Secure and Check the Level
Add washers and nuts to the closet bolts and tighten by hand, then snug them with a wrench in small alternating turns, similar to how you'd tighten lug nuts, so the toilet settles evenly rather than tilting.
Don't overtighten. Porcelain can crack under excessive torque. Tighten just until the toilet feels solid and doesn't rock — usually only a quarter turn or so past hand-tight.
Set a level across the top of the tank and across the bowl rim. If the toilet rocks or sits unevenly on an uneven floor, plastic toilet shims can be slid under the base at the low points before final caulking.
Snap off the excess bolt length with a hacksaw if needed, then snap the plastic caps over the bolt heads.
Step 8: Reconnect Water and Test for Leaks
Reconnect the supply line to the shutoff valve and fill valve, hand-tightening and then giving it a small additional turn with a wrench — snug, not forced. Turn the shutoff valve back on slowly.
Let the tank fill, then flush several times over the next {measure:15 minutes}, checking closely around the base each time for any sign of water. Feel around the base with a dry paper towel — it will show moisture instantly even if it's not visually obvious.
Step 9: Caulk the Base (Optional but Recommended)
Many plumbers now recommend running a bead of caulk around the base of the toilet, leaving a small gap at the back, so that any future leak shows up as water pooling near the back of the toilet rather than being hidden or spreading under the floor. Let it cure per the caulk manufacturer's instructions before heavy use.
FAQ
How do I know if I need a standard or extra-thick wax ring? It depends on how far the closet flange sits below the finished floor. If the flange is level with or slightly above the floor, a standard ring is fine. If it sits noticeably recessed — often after new tile or flooring was installed over an existing flange — an extra-thick or double wax ring, or a flange extender kit, gives you enough material to bridge the gap and seal properly.
Can I reuse a wax ring if I only lifted the toilet briefly? No. Once a wax ring has been compressed and then disturbed, it won't reseal reliably even if it looks intact. Always install a fresh ring any time the toilet has been removed, even for a quick peek at the flange.
Is it okay to use a wax-free (rubber or foam) seal instead? Many homeowners and plumbers do use non-wax gasket alternatives, particularly for flanges that are hard to reach or for previous wax-related failures; they can be reused if you need to remove the toilet again shortly after. Check the seal's instructions, since fit and orientation requirements can differ from a traditional wax ring.
Why does my toilet still rock after installing a new wax ring? Rocking is usually a floor-level problem, not a wax problem. Check for an uneven floor and use plastic shims to stabilize the base before final tightening, then caulk around the base once it's stable.
How long does a wax ring typically last? There's no fixed lifespan, but a properly installed ring on a stable toilet that hasn't been moved can often last many years without issue. Repeated toilet removal, a rocking bowl, or a flange that's the wrong height relative to the floor are the most common reasons a seal fails prematurely.